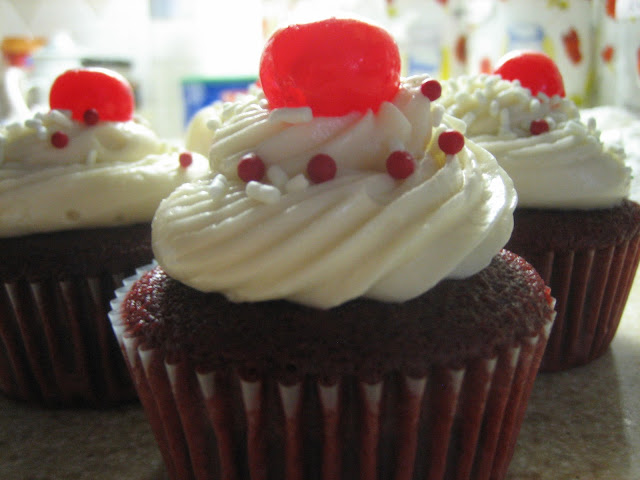
the scarlet cupcake REDUX
I learned that a true velvet cake is essentially a buttermilk cake with a smidgen of cocoa flavoring and a whole bottle of red food coloring. I originally vlogged/blogged about Hershey's Red Velvet Cake but I've since found a more exceptional cake. The process of preparing the cake is the same as shown the the video, but some of the ingredients and the amounts of ingredient are different. This cake is truly delicious. The flavor of the buttermilk shines through with a slight hint of cocoa. And I don't believe food coloring has a distinguishable taste and it does not leave a visible red residue in your mouth or on your tongue and lips. The texture is fabulous. The crumb is large resulting in a spongy-looking and airy-tasting cake despite it actually being a dense cake. Not only that, but each crumb packs a punch because the cake is incredibly moist. It stays fresh for days in the fridge mainly because this cake utilizes oil as its fat, not butter. And also because it has an addition of hot water to the batter which is something I just adore about the Hershey's Perfectly Chocolate recipe!
This is a great recipe if you're looking for something a little bit different. And if the thought of artificial coloring abhors you, feel free to subsitute it with plain water (remember, you can't take away an ingredient without replacing it. Baking is a science!). As for a cream cheese frosting to accompany the cake, you can use whatever you wish. I'm not a fan of frosting, but there are tons of websites out there that can direct you in that area. It's just basically a combination of cream cheese, butter, confectioners' sugar and vanilla extract. How much you use of each ingredient depends on your flavor preference. :)
Red Velvet Buttermilk Cupcakes
Recipe adapted from Martha Stewart's Red Velvet Wedding Cake
Ingredients for 24 cupcakes
2 1/2 tablespoons unsweetened cocoa powder, plus more for dusting
2 1/2 cups cake flour (not self-rising)
1 teaspoon salt
1 1/2 cups sugar
1 cup canola oil
2 large eggs
2 tablespoons red food coloring
1 teaspoon pure vanilla extract
1 cup low-fat buttermilk
1/2 cup hot (but not boiling) water
1 1/2 teaspoons baking soda
2 teaspoons white vinegar
Directions
1) Whisk together flour, salt, and cocoa in a medium bowl; set aside.
2) Place sugar and oil on low speed in the bowl of a mixer fitted with the whisk until combined. Add eggs one at a time; mix well after each addition.
3) Mix in food coloring and vanilla. Add flour mixture in 3 batches, alternating with the buttermilk and beginning and ending with flour, mixing well after each addition. Scrape down sides of bowl as needed.
4) Stir together baking soda and vinegar in a small bowl. Add baking-soda mixture to batter, and mix on medium speed for a few seconds.
5) Mix in the hot water until just combined. Pour batter into prepared pans. Bake until a toothpick inserted into centers comes out clean, 15 to 18 minutes. Let cool completely on wire racks.
6) Frost with cream cheese frosting if desired.


Pretty!
ReplyDelete